

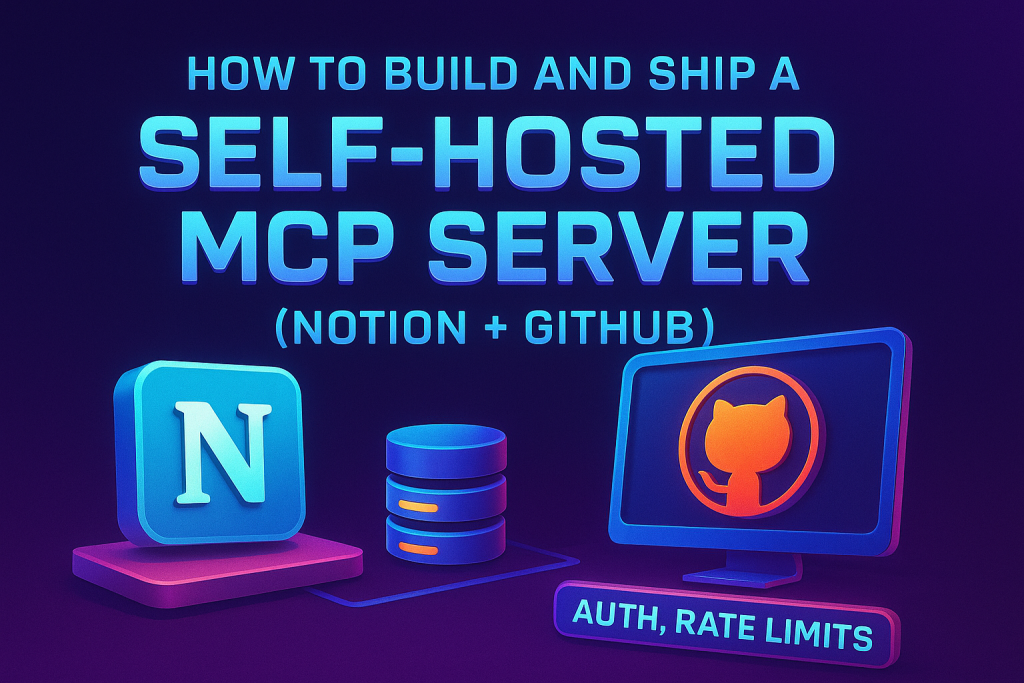
Building your own Model Context Protocol (MCP) server can feel like making a custom gadget – half mad science and half stroke of genius. Naturally, I decided to combine Notion and GitHub into one self-hosted MCP server because, hey, why not double the challenge? (High ambition is my middle name, right before high caffeine consumption.) This guide walks through setting up a dual Notion+GitHub MCP server with proper OAuth2.1 authentication, throttling misbehaving AI agents, keeping an audit trail of their antics, supporting multiple users, and deploying the whole thing on Docker/Kubernetes.
You can find the Github Repository for this project here: thevysh/githubnotionmcp

Setting Up MCP Servers for Notion & GitHub
What’s an MCP server anyway? Think of MCP as the “USB‑C port for AI applications” – a universal interface for connecting AI models to various tools and data sources. An MCP server acts as a bridge between AI agents and services like Notion or GitHub, exposing tools (actions the AI can invoke) and resources (data the AI can fetch). In plain terms, the MCP server translates a natural language request from an AI (“Create a task in Notion” or “Open a PR on GitHub”) into actual API calls to those services. It gives our friendly neighborhood AI assistant a way to do things instead of just talk about things.
Both Notion and GitHub have official MCP server offerings. Notion’s own hosted MCP server lets AI assistants securely read and write your workspace – essentially letting an AI “co-worker” edit pages and databases with your permission. GitHub’s official MCP server similarly empowers AI agents to browse code, manage issues, review PRs, and generally work with your repositories via natural language. These are powerful – hooking AI into your second brain (Notion) and your codebase (GitHub) can supercharge productivity. But being the god-tier developer I am, I wanted my server to handle both, self-hosted, under my control (because who doesn’t love playing DevOps at 2 AM?).
Setting up a basic MCP server means choosing a framework or library to build it. You can roll it from scratch in your favorite language, but there are SDKs to make life easier (Notion provides an official TypeScript SDK, and there’s Octokit for GitHub’s API in Node, etc.). For my build, I went with Node.js and Express, even though I am not as seasoned in Node.js, I just have extra courage now thanks to all the new AI tools. I separated the logic for Notion and GitHub into distinct “tools” within the server. For example, I have tools like search_notion, create_notion_page and create_github_issue, list_github_repos, etc., each encapsulating one API action. The MCP spec standardizes how these tools are described and invoked by the AI client, so I followed that format (imagine describing each tool’s inputs/outputs so the AI knows how to call it).
To keep things simple (famous last words), you could run two MCP servers – one for Notion, one for GitHub – and have your AI connect to both. But maintaining two servers felt like double the headache. Instead, I channeled my inner overachiever and built one combined server serving both contexts. It’s not unprecedented: there are unified MCP servers that connect to many apps (for instance, an open-source project “Rube” connects AI tools to Gmail, Slack, GitHub, Notion – 500+ apps!). If they can juggle five hundred, I figured my humble duo is manageable. (This is the part where I pat myself on the back for efficiency while conveniently ignoring the extra complexity I signed up for.)
In practice, combining Notion and GitHub just meant implementing all the necessary endpoints in one codebase. My Express server initializes two API clients – one for Notion, one for GitHub – with their respective credentials. Then it registers a bunch of routes or RPC handlers that correspond to the available MCP tools. For example:
// Pseudocode for MCP tool endpoints
app.post('/tools/notion/search', async (req, res) => {
const query = req.body.query;
const results = await notion.search({ query });
res.json(results);
});
app.post(‘/tools/github/create_issue’, async (req, res) => {
const { repo, title, body } = req.body;
const issue = await github.rest.issues.create({ owner: “…”, repo, title, body });
res.json(issue);
});
Each tool has a name and endpoint, and returns a JSON result that the AI client will receive. Under the hood, I’m using the Notion SDK to search pages and the GitHub REST API (via Octokit) to create an issue in this pseudocode. This structure lets the AI agent ask, “Hey MCP server, use the notion/search tool with query X” and the server does the rest. It’s a beautiful symphony when it works – the AI says “create a task in Notion about X”, the MCP server executes create_page on Notion’s API, and voila, a new Notion page appears as if the AI had fingers to type. When it works, I feel like a genius orchestrating AI workflows. When it doesn’t… well, more on that in the debugging (audit logs) section 😅.
Importantly, to actually use this server, we need to handle authentication – both the AI client to our server (so not just anyone can hit our endpoints) and our server to the Notion/GitHub APIs (so it acts on behalf of authorized users). So let’s talk auth, where I both shine and stub my toes.
Implementing OAuth 2.1 & Token Flow
Security is no place for cowboy coding. I wanted robust OAuth 2.1 flows so users (including myself) could grant the MCP server access to their Notion workspace and GitHub repos without handing over raw passwords or API keys. In other words, OAuth2.1 with PKCE is my BFF here. The goal: a user should be able to click “Authorize Notion” and “Authorize GitHub” in a nice web UI, go through the familiar OAuth consent screens, and our server gets tokens to act on their behalf. This is exactly how the official Notion MCP does it – users go through a one-click OAuth to connect the integration, and the MCP server securely stores the resulting token for API calls. We’re basically implementing that ourselves, with a few modern best practices.
OAuth 2.1 is basically OAuth 2.0 but with eight years of hard lessons baked in. It doesn’t reinvent the wheel so much as tighten the bolts. Major changes? Implicit grants are gone (no more #access_token in URLs, thank you), the old resource-owner password grant is gone (we stopped asking for passwords directly, we’re not phishers), and Proof Key for Code Exchange (PKCE) is mandatory for all clients. In short, OAuth 2.1 says: always use the Authorization Code flow (which exchanges a one-time code for tokens) and always use PKCE (which adds a dynamically generated secret to prevent interception). For our implementation, this meant we set up an OAuth authorization server (or leverage existing ones like GitHub’s OAuth service and Notion’s OAuth if available) to handle the dance.
Here’s how the token flow works in practice:
- Register OAuth Apps: I created an OAuth app in GitHub’s developer settings (to get a client ID/secret) and likewise an integration in Notion with OAuth enabled. These give the MCP server a public Client ID and a Client Secret (for GitHub) and similar credentials for Notion’s side. I configure redirect URIs to point back to my MCP server (e.g. https://my-mcp-server.com/callback/github).
- User Login (Auth Code flow): When a user wants to connect, they hit an endpoint on my server, say /auth/github/login, which redirects them to GitHub’s authorization page with the right parameters (response_type=code, client_id, requested scopes, and a PKCE code challenge). The user approves access to their repos, and GitHub redirects them back to my callback with a ?code=XYZ.
- Token Exchange: My callback handler receives that code (and the PKCE verifier we stashed in the user’s session or a state token), then makes a back-channel request to GitHub to exchange the code for an access token (and optionally a refresh token). If all goes well, GitHub returns tokens which my server stores (securely! more on storage in Multi-Tenant section).
- Repeat for Notion: The Notion OAuth works similarly – user gets sent to Notion’s auth page to select which workspace and what permissions to grant to my integration, and on return I grab the Notion API token (Notion’s API uses a token that doesn’t expire often, but treat it with care).
- Store & Use Tokens: Now my MCP server has tokens to act on behalf of the user. Every time the AI agent triggers, say, a Notion tool call, my server attaches the user’s Notion token in the API request (Authorization header). Same for GitHub – any GitHub tool invocation uses the stored GitHub OAuth token for that user.
I implemented this with OAuth2.1 compliance in mind. That means I enforced PKCE (the server generates a random code verifier and challenge for each auth request – no code interception on my watch) and I did exact redirect URI matching (no wildcard shenanigans, to prevent open redirect attacks). I also avoided storing bearer tokens in URL query params or any insecure medium (OAuth2.1 explicitly disallows putting tokens in the query string). Refresh tokens, if any, are stored and used server-side only, and I opted for short-lived access tokens where possible. (Yes, I’m the paranoid type – but only because I prefer sleeping at night instead of dealing with a security breach.)
One more thing: our MCP server itself should require authentication. I don’t want random internet users (or more likely, random AIs) invoking my Notion and GitHub tools without permission. So, I implemented an auth layer for the MCP server too – in my case, I issued a simple API key or session token to the AI client once the user linked their accounts. The AI (like Cursor or whatever is calling the MCP) must include this key in each request. Think of it as a mini OAuth for the MCP client: once the user has authorized Notion/GitHub, the server says “OK, here’s your token to call my endpoints.” This could be a JWT or even a simple random token stored server-side. In development I was lazy and used a fixed API key header, but in production a per-user session token is the way to go.
Speaking of sessions and multiple users… how do we handle multiple people using this server concurrently, each with their own Notion pages and GitHub repos? Time to tackle multi-tenancy – but first, let’s make sure one overly enthusiastic AI doesn’t bring down the whole server or spam our APIs to death.
Adding Rate-Limit Middleware
If there’s one thing I’ve learned building AI integrations, it’s that AIs don’t have an off-switch on curiosity. We need to rate-limit the requests hitting our server, both to protect the external APIs (so we don’t exceed GitHub or Notion quotas unless you own a ‘black AMEX card’ or trigger abuse detection) and to keep our own server stable. Plus, if an AI agent gets stuck in a loop (“check updates… no new updates… check updates… rinse, repeat”), you don’t want it calling your endpoints a thousand times a minute. My approach: create a a middleware that says “Easy there, turbo” whenever requests exceed a reasonable threshold.
Since I used Express, I happily installed express-rate-limit – a handy npm package that does exactly what it sounds like. In a few lines, I set a window and a max. For instance, I configured something like:
const rateLimit = require('express-rate-limit');
const limiter = rateLimit({
windowMs: 1 * 60 * 1000, // 1 minute window
max: 30 // max 30 requests per IP per minute
});
app.use(limiter);
This globally limits each IP to 30 requests per minute. Under the hood, the middleware tracks incoming requests by key (IP by default) and if the count exceeds max within windowMs, further requests get a HTTP 429 Too Many Requests error.
I also considered more granular limits: e.g. X requests per user or even per tool. For example, maybe allow more frequent read operations but throttle write operations heavier. express-rate-limit allows custom key functions (so you could key by a user ID if you pass one, rather than IP) and you can attach different limiters to different routes. For simplicity (and because I was already juggling flaming chainsaws with this project), I kept one global limiter. Thirty requests a minute turned out to be plenty for normal agent use, and it effectively stopped runaway scenarios. If you push it harder (maybe your AI writes code and opens 100 GitHub issues in one go – an AI project manager from hell), you might need to fine-tune these numbers or implement exponential backoff. But the point is: don’t deploy without rate limits unless you enjoy getting ban emails from platform providers or a monstrous cloud bill. My future self will thank me for this, even if present me muttered about “yet another config” while setting it up.
Fun fact: implementing rate limiting was one of those rare moments I felt smart on the first try. Plug in the middleware, test a quick burst of requests, see the 429 responses after the threshold – it just worked. Of course, I later DDoS’d my own server in testing (on purpose!) to ensure it held up, which is the kind of thing that makes one feel both powerful and absurd. But hey, better I crash my dev instance than an AI run amok crashes production.
Now that we’ve leashed our enthusiastic AI friend a bit, let’s ensure we can peek at what it’s doing. Because trust me, when your server starts doing weird things, you’ll want an audit trail to figure out whether it was a bug in your code or an AI with a “creative” interpretation of your instructions.
Building Audit Logging
Logs are a developer’s best friend and an AI’s worst enemy (since they expose all the silly things the AI tried to do!). From day one, I knew I needed detailed logging and audit trails in this MCP server. Not just basic “X happened” logs, but a clear record of who called which tool, when, with what parameters, and what result. Essentially, I wanted a diary of the AI agent’s activities – both for debugging and for accountability. If an AI using this server deletes a Notion page or closes a GitHub issue, I want to see exactly which action was taken and on whose behalf. Think compliance and security: if multiple people use this, I might even need logs to prove the AI only accessed what it was supposed to.
I approached logging on a few levels:
- Request/Response Logs: Every time a tool endpoint is hit, I log the user calling it, the tool name, and a summary of parameters. Then I log whether it succeeded and maybe the size of the response or a snippet of it. This is kinda similar to logging API calls. According to best practices, important events to log include user activities, API calls, and data access events – which aligns perfectly with our needs. So for each API call to Notion or GitHub through the MCP, I generate a log entry.
- Error Logs: If any tool call fails (exception, API error, etc.), that’s logged with error details. This helps in troubleshooting – if the AI got a 404 or 401 from GitHub, I’ll know.
- Security Audit Trail: Particularly for admin review, I keep an audit log (which could be a separate file or database table) recording sensitive changes. E.g., “User X’s token used to create page Y in Notion at time Z.” Essentially a subset of logs focusing on actions with side effects.
To make logs useful, I structured them in a consistent JSON format (structured logging FTW!). A sample log entry in my server might look like:
{
"timestamp": "2025-10-22T09:26:00Z",
"user": "alice@example.com",
"action": "notion.create_page",
"params": {"database": "Tasks", "title": "Buy milk"},
"result": "success",
"details": {"pageId": "abcd-1234-efgh-5678"}
}
This is way easier to search and analyze later than a free-form text log. (Yes, I’m that person who will load logs into an analytics tool to find patterns. My self-praise moment: “See, I planned for future me to have nice things like queryable logs.”) As recommended in many compliance guides, logging “who accessed what, when” is critical. I took that to heart (Only because I knew I’d be writing about it 🥲).
I also set up a centralized log collection. On my Kubernetes deployment (next section), logs from the app are shipped to an ELK stack. Elasticsearch + Kibana means I can run queries like “show me all actions by user X last week” or “how many GitHub API errors occurred today”. This might be overkill for a small project, but if you’re aiming to support an internal tool with multiple devs or an open-source community, you’ll want this. It paid off the first time I needed to debug why an AI prompt didn’t do anything – I checked the audit log and saw the tool call was made with missing parameters (thanks to a prompt parsing issue). Without logs, I might’ve blamed a bug in my code; with logs, I could trace it to the real cause.
One more bit: storing logs securely and managing retention. Logs can contain sensitive info (like user email, or even content from a Notion page in parameters). I made sure my logs don’t accidentally leak tokens or passwords (filtering out Authorization headers, etc.), and I restricted who can access the log system. Role-based access control on logs is important – only maintainers should see them, since they could contain user data. I also set a retention policy (I prune or archive logs older than 30 days) to balance between audit needs and not hoarding data forever.
Overall, adding thorough logging made me feel safe – like having a black box recorder on a test flight. It’s both humbling and amusing to read through logs after a day of AI usage. There’s high self-praise in seeing all the successful automations (“Look at all the tasks I automated, I’m basically Tony Stark!”) and a bit of self-mockery when you see errors that were totally your fault. But I’d rather have that record and learn from it than fly blind.
Multi-Tenant Considerations
Initially, I built this server just for me (a single tenant – just my own Notion and GitHub). But interest grew (the tool actually worked, surprise!), and I needed to allow multiple users or teams to use it without their data colliding. Multi-tenancy in an MCP server means each user’s credentials and data remain isolated, even though the server is shared. If Alice and Bob both connect their Notion accounts, Alice’s requests should only ever use Alice’s Notion token and content, and Bob’s use Bob’s. Sounds obvious, but implementing this added layers of complexity that induced both pride (“I architected a multi-tenant system!”) and humility (“wow, I really need to prevent Alice’s token from ever leaking to Bob’s requests”).
Here’s how I tackled it:
- Dynamic Credentials: Instead of the server using one fixed token for Notion or GitHub (like I had in .env for single-user mode), I now store tokens per user. As one Reddit user succinctly put it when discussing multi-user MCP servers: you need dynamic credentials so each request can execute on behalf of that user. So I set up a database (or you can use a simple in-memory store for fewer users) mapping each user to their OAuth tokens (Notion token, GitHub token, plus perhaps refresh tokens or expiration info).
- Session Management: When a user completes the OAuth flow, I create a session or entry in that DB. I generate a session ID or API key for the user to use when calling the MCP server. In practice, this could be a JWT that encodes the userID, or just a random token stored on the server side. One approach (inspired by others who have done this) is to have the client (AI tool) include the session ID with each request (e.g., in the header or as part of the JSON payload). That session ID tells the server “use Alice’s credentials for this call.” For example, the AI’s request might look like: { “session”: “abcd1234”, “tool”: “notion.search”, “args”: {…} }. The server looks up session abcd1234, finds it maps to Alice’s account, retrieves Alice’s Notion and GitHub tokens, and proceeds to execute the tool call with those.
- Isolating Data: I built guardrails in code: each request handler, before doing anything, verifies the session/user and attaches the correct auth. It’s a simple step to attach the right token, but it’s crucial. I also double-check resource identifiers. For example, if Bob somehow tried to pass an ID of Alice’s Notion page, the server should ideally not allow it. In practice, if Bob’s token is used, Notion’s API itself will deny access to Alice’s page – an extra safety net. But I like belt-and-suspenders: I tag stored data like “this page ID belongs to user X’s workspace” when caching or whatever, so I can preempt obvious mix-ups.
- Tenant Config: Multi-tenancy also means being mindful of configuration per tenant. Maybe user Alice wants different rate limits than Bob, or one has access to certain advanced tools. I didn’t go too far down that road (treat all users equally for now), but I can foresee adding per-tenant settings (I’m just cool like that).
- Onboarding and UX: I ended up creating a simple web UI where users can log in (just to my MCP server) and connect their accounts. It’s not fancy – think two “Connect with Notion” and “Connect with GitHub” buttons. But it handles setting up their session. After that, I give them an endpoint URL and their session/API key to plug into their AI client (like in Cursor’s settings JSON, they’d put the URL of my server and the auth token). This part made me feel both proud (I basically built a tiny SaaS onboarding) and amused (I became my own identity provider? yikes).
The takeaway: it’s definitely doable to support multiple users, just plan out how to segregate credentials and data. Store tokens securely (use encryption at rest if possible, or at least environment-protected secrets). And as one more layer, I implemented basic role-checks – e.g., only I (admin) can call certain diagnostic tools I exposed, regular users cannot. In an enterprise scenario, you’d even integrate with an SSO or directory to manage users. I’m not quite enterprise-scale (my cat and a couple friends testing this hardly count as an enterprise), but I’m ready if we get there.
Also, on the topic of security, I’d recommend anyone making their MCP server multi-tenant to follow the principle “never trust the client for identity” – always enforce session validation server-side – and “never mix user contexts” – always load creds/config per request, don’t rely on any global state that might bleed between users. Sounds obvious, but when you’re knee-deep in code, it’s easy to slip. I definitely had moments of “Oops, that was using the wrong token!” followed by frantic refactoring. Each oops made the system tighter, though, so in a way I’m grateful for the mistakes (Don’t ask what mistakes I made 🤫).
Alright, we’ve engineered this thing – it’s feature-packed and (mostly) robust. Time to actually deploy it and keep it running. Cue the Docker build and Kubernetes configs – the part of the story where our hero (me) briefly becomes a DevOps jester.
Deployment to Docker/Kubernetes
Building a cool server means nothing if you can’t ship it. As someone who has uttered “but it works on my machine!” too many times, I prioritized containerizing this MCP server early. Docker to the rescue. I wrote a Dockerfile that’s straightforward: use an official Node base image, copy my code, npm install, expose the port, define the entry command. Containerizing ensures the server runs the same everywhere – no “it required Node 18.12.1 on Tuesdays” issues. This gave me the confidence to then deploy on a Kubernetes cluster for scalability and resilience (and yes, partly because saying “I have it on K8s” sounds cool, admit it).
Containerization: Packaging the server in a Docker image was step 1. This makes environment setup consistent across dev, staging, prod. For example, my Dockerfile installs Node, then copies in the package.json and source, sets PORT=8080 and exposes 8080. All the config like Notion and GitHub client IDs/secrets are provided via environment variables at runtime – you don’t bake secrets into the image (I’m not about to leak my OAuth secrets in an image push). I also pinned specific dependency versions in package.json to avoid “but 2.0.7 broke it!” surprisesio. After building the image, I tested it locally with Docker Compose (I even wrote a quick docker-compose.yml for local Notion + GitHub + maybe a local database for sessions).
Kubernetes Orchestration: I chose Kubernetes for deployment (could be overkill, but I have other services running so it fit in). I wrote the manifest YAMLs – a Deployment for the MCP server, a Service to expose it internally, and an Ingress to allow external access via HTTPS. Kubernetes handles scaling and self-healing: I can run, say, 3 replicas of the server for load balancing and if one crashes, K8s will restart it. (There was a moment of high self-praise when I did a rolling update with zero downtime – “I am the master of DevOps!”, but the Dog at the cafe where I was working was not impressed.)
Within Kubernetes, I made use of ConfigMaps and Secrets for configuration. The OAuth client secrets and any API keys go into a Secret (mounted as env vars), and non-sensitive config (like default rate limits or feature flags) in a ConfigMap. The principle is to not hardcode stuff and keep it easily updateable. For example, if GitHub gives me a new client secret, I update the Secret and redeploy – no need to rebuild the image. I also ensured proper network policies: the server pods can reach out to Notion and GitHub endpoints, but are restricted from any other egress (lock it down just in case).
Security & Secrets: I touched on it, but to stress: use something like Vault or your cloud’s secret manager to store credentials. My K8s secrets are encrypted at rest and not visible to prying eyes. Also, enable TLS! I used Let’s Encrypt certificates on the ingress, so all traffic to the MCP server is HTTPS. We’re dealing with tokens and potentially user data; encryption in transit is non-negotiable. Kubernetes ingress + cert-manager made it pretty painless (minus the usual pain of wrangling YAML, which I counteracted with some self-deprecating jokes in commit messages).
I won’t lie, deployment was one of those times I oscillated between “I’m an absolute legend for getting this working” and “I have no idea what I’m doing, please send help”. But in the end, I had a running service and accessible to me and my collaborators.
Now, the story wouldn’t be complete without keeping an eye on this thing in production. An unmonitored service is basically Schrodinger’s app: it could be fine or it could be on fire, and you wouldn’t know until users scream. Let’s talk monitoring (aka “the art of never truly relaxing”).
Monitoring and Observability
Once our MCP server was live, I set up monitoring so comprehensive that it verged on paranoia – and I say that proudly. Metrics, logging, and alerts are the trio that keep my anxiety at bay (or sometimes heighten it at 3 AM, but oh well). Here’s my monitoring stack and strategy:
- Metrics (Prometheus & Grafana): I integrated Prometheus to scrape custom metrics from the server. I exposed an endpoint (e.g. /metrics) using Prometheus client libraries. I track things like number of tool calls, latency of external API calls (Notion and GitHub), rate-limiter activations, and so on. Grafana dashboards then display these metrics in real time. It’s quite satisfying to see, for example, a graph of “Notion API requests per minute” and watch the peaks during the day. Key metrics also include memory and CPU usage of the pods (K8s gives these), so I know if I need to scale up resources. I set alert rules: if response latency spikes or error rate goes above some threshold, sound the alarm.
- Centralized Logging: We already have rich logs; now I make sure they’re aggregated. In K8s, each pod’s stdout is piped to a logging system. I used Elasticsearch + Kibana (the ELK stack) so I can search logs across all pods and time. This made debugging multi-replica issues easier – I can query by session ID across all logs to trace a user session that might have hit different pods. I also set up Kibana alerts for certain log patterns (e.g., if the word “ERROR” appears too many times in an hour, ping me). This might be overkill, but it’s like having a smoke detector in every room better safe than sorry.
- Health Checks: I added a /healthz endpoint that does a simple check (like verify it can query a trivial internal function or that the rate limiter is loaded – nothing fancy, just a ping). K8s pings this to ensure the pod is healthy; if not, it restarts it. This prevents a scenario where the process hangs but doesn’t fully crash. Additionally, I use uptime monitoring externally – a service that hits the public endpoint periodically to ensure it’s responding.
- Alerting Setup: All the metrics and logs funnel into alerts. I connected Prometheus Alertmanager to send me notifications (Slack and email) if something is off. For example, if CPU usage stays above 80% for 5 minutes, I get an alert (maybe the AI got very busy or stuck). If the Notion API starts returning 401 (auth errors), I get an alert – could mean tokens expired or a permissions issue. Alerts exist for high latency (maybe an external API is slow) and for any instance going down unexpectedly. Yes, it’s a lot of noise to configure, but after some tuning, it’s at the point where if my phone buzzes, I know it’s legit. The downside: the first week after deployment, my phone buzzed a lot (mostly due to my misconfigurations!). Picture me at 3 AM, bleary-eyed, muttering self-deprecating things like “Good job, you managed to alert yourself because you set the alert threshold too low. Genius move.” After fixing thresholds, now when I get an alert it’s usually something real, like a rate-limit threshold hit or an external API outage.
To maintain some humility, I’ll admit: despite all this monitoring, an incident still caught me off guard. GitHub’s API had a temporary hiccup (rate limiting us on their side, oh the irony) which caused a cascade of tool failures. I had alerts for errors, but I was in a meeting and missed the Slack ping. By the time I checked, a few AI requests had failed. No major harm done, but it reminded me that even the best monitoring doesn’t help if you ignore it. I adjusted by adding a fallback – if GitHub API returns specific errors, I capture that and surface a clear message to the user/AI (“GitHub is currently not responding, please try later”) instead of silently failing. And I added a status page where I can quickly see the health of external dependencies.
On a positive note, the logs and metrics also gave me insight into usage patterns. I could see which tools were used most (turns out, “notion.search” was super popular, while “github.create_issue” was less used – likely because I mostly tested that one myself). This helped me optimize: I focused on improving the performance of the heavy-use paths and maybe not worrying as much about the rarely used ones. In true self-congratulatory fashion, I called this “data-driven optimization” – which is a fancy way of saying I looked at a Grafana pie chart and went “oh, better fix that function, it’s called 100x more than others.” 😎
To wrap up monitoring: it’s an ongoing process. I periodically review the dashboards and ask, are these the right things to watch? As the system evolves (if I add new tools or new integrations), I update the monitoring accordingly. It’s both a safety net and a performance tuning aid. And yes, sometimes it’s a source of humor – like when I deployed an update that accidentally doubled the logging output and my logging volume graph went through the roof. The team joked that I invented a new way to DoS myself: log everything twice. That deployment was quickly rolled back – but hey, the monitoring caught it immediately, so I’ll count that as a win for observability (and a lesson in testing).
Conclusion (Keeping it Real)
In building and shipping this self-hosted MCP server for Notion + GitHub, I went through the full rollercoaster: vision, struggle, triumph, facepalm, iteration, and celebration. On the one hand, I’m unabashedly proud – I mean, I basically created a personal assistant that writes to my Notion and manages my GitHub, all under my roof (or cloud cluster). The high self-praise is earned when I see it working: “Dang, I built that!” On the other hand, this project kept me humble – every time I thought I was hot stuff, a new bug or challenge would smack me down a peg (“Dang, I built that?”).
To quickly recap the journey in practical terms (in case you skimmed for the goodies):
- MCP Server Basics: We set up a unified server to expose Notion and GitHub as AI-invokable tools, leveraging the idea of MCP as a standardized interface. We drew inspiration from official servers (Notion’s hosted service and GitHub’s) but combined them for flexibility. The architecture cleanly separates tool handlers and uses SDKs/REST calls under the hood.
- OAuth2.1 Auth Flow: Implemented secure OAuth flows with PKCE, no shortcuts. Each user goes through an OAuth consent for Notion and GitHub, and we securely store their tokens. We obey OAuth 2.1’s mandate to drop implicit grants and require PKCE, ensuring we don’t inadvertently open security holes. The server itself issues session tokens to clients to authenticate future requests.
- Rate Limiting: Because we don’t actually want to become Skynet’s spam engine, we applied rate-limit middleware. For example, X requests per minute per IP, returning 429s when over limit. This protects both our resources and upstream APIs. It’s simple, effective, and saved us from at least one infinite loop fiasco.
- Audit Logging: We log everything that moves (within reason). Every tool call, every outcome – into structured logs. These logs provide an audit trail for security and a debug trail for us. We follow best practices like centralized logging and restricted access. This way, when something weird happens, we know what the AI did last summer (or five seconds ago).
- Multi-Tenancy: We built the server to handle multiple users by segregating credentials and using session-based scoping. Each user’s Notion/GitHub tokens are isolated, and the server chooses the right creds per request. We’ve effectively created a mini SaaS out of our MCP server, with the necessary session management and permission boundaries to keep users out of each other’s data. It’s not zero-effort, but it’s achievable with careful design.
- Deployment & DevOps: Containerize early, deploy wisely. Docker gave us consistency, Kubernetes gave us scalability and reliability (plus a chance to exercise our YAML writing muscles). We configured environment variables for secrets and settings, used CI/CD to automate deployments with safe practices, and leveraged cloud/cluster features for security (TLS, secret management). In short, we treated this project “for real,” not just as a script running on a Raspberry Pi in the closet (though, nothing wrong with that for a hobby project!).
- Monitoring: Finally, we instrumented the heck out of it. Metrics, logs, and health checks ensure we know what’s happening. We set up dashboards and alerts so that we’re the first to know of any issues. Our MCP server has its own watchdog, and by that I mean me – getting notified if it sneezes. This keeps us honest (and occasionally sleep-deprived, but in a good way).
Throughout this build, I repeated what’ve I’ve been saying for over a decade: Sometimes “I am so good at this” and the other times: “I’m so f*cking stuping! I can’t believe I missed that.” Guess that how it’s going to be for the end of times.
If you’re a beginner or an experienced dev eyeing your own AI agent + MCP project, I hope my story offers valuable insights (and warnings!). Be practical: use the libraries and tools available, don’t reinvent OAuth or rate limiters. But also be adventurous: tailor the system to your needs. It’s absolutely doable to create powerful AI agent integrations with internal tools or open APIs – and you don’t always need to wait for official solutions if you can build one.
Happy building, and may your AI agents be ever obedient (and if not, at least you’ll have the logs to put them in line)!