
Do you have a website with a contact form that does not send emails? It can be frustrating to build a beautiful website only to have a contact form that does not work. Many website owners need a simple way for visitors to reach them. This guide shows you how to connect your HTML contact form to an email service. You will use a tool called EmailJS. It helps you get messages from your website directly to your inbox. This method works for any website, whether it uses HTML, PHP, or JavaScript.
See the Contact Form in Action
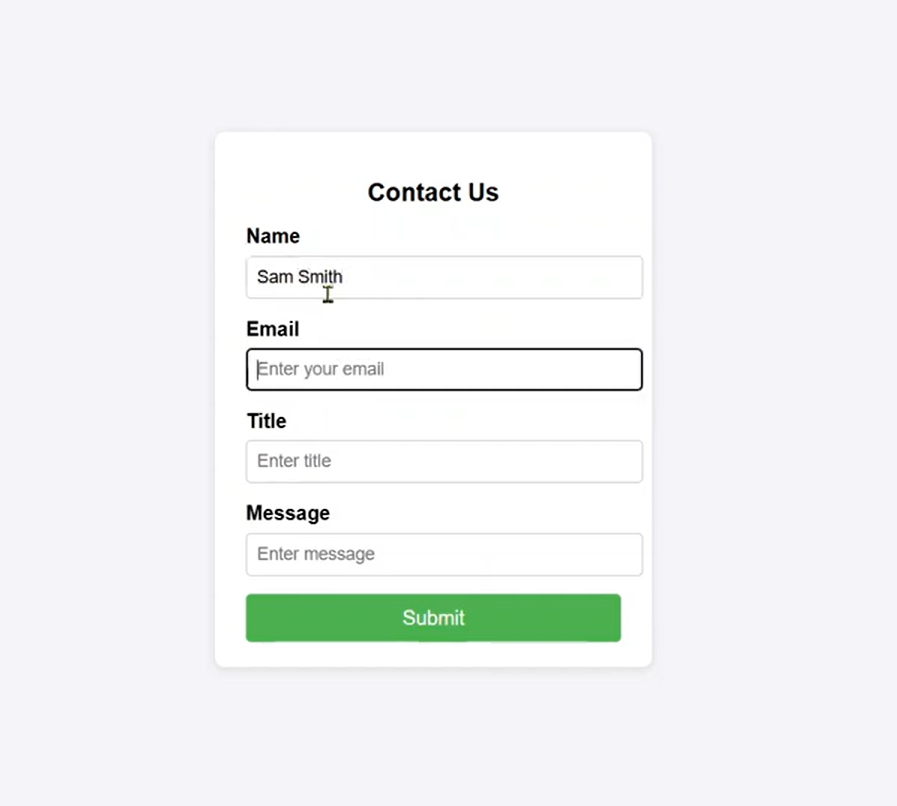
Imagine a simple contact form on your website. A visitor named Sam Smith fills it out. They enter their name, email, a title like “Very Good Service,” and a message such as “I am impressed by your service. Thank you.” When Sam clicks the Submit button, the form sends an email. You, as the website owner, receive this email. You can then contact Sam Smith if you need to. This quick process helps you stay in touch with your visitors and customers.
Setting Up Your EmailJS Account
To start sending emails from your contact form, you need to set up EmailJS.
Sign Up or Sign In to EmailJS
First, visit the EmailJS website. If you are new, sign up for an account. If you already have an account, just sign in. The creator of this guide will share the code for this example on GitHub. You can check it there if you want to use it as a starting point.
Add a New Email Service
Once you sign in, look for the option to Add New Email Service. This service connects EmailJS to your email account. This is the account that will send emails when someone fills out your form.
Here are the steps to set up your email service:
- Choose Your Email Provider: You can use a personal Gmail account or another email service.
- Service ID: EmailJS creates a Service ID automatically. You can keep this default ID or change it if you wish. It is often fine to leave it as it is.
- Test Email: You might see an option to receive a test email. You can uncheck this if you do not want one.
- Connect Account: Click on Connect Account. EmailJS will ask you to choose which email account you want to use for sending.
- Grant Access: Select your desired email account and grant EmailJS permission to send emails from it.
- Create Service: After giving access, click Create Service. Your email service is now ready.
Creating Your Email Template
After setting up your email service, the next step is to create an email template. This template defines what the email you receive will look like. It uses the information from your contact form.
Why Templates are Important
Email templates help organize the messages you get. They ensure that all the details from your contact form appear clearly in your inbox. Our example contact form has four main fields:
- Name
- Title
- Message
Your template needs to match these fields.
Steps to Create a New Template
- Select a Template: On the EmailJS dashboard, choose to create a new template. EmailJS offers basic “Contact Us” templates and other fancy options. For a simple contact form, the basic “Contact Us” template works well.
- Edit Template Content: Once you create the template, you will see its content. This is what will be sent to your admin email.
- Subject Line: The template will likely have a subject line like “Contact Us Title.” This will auto-populate with the title from the form.
- To Email: Make sure this is set to your administrative email address, for example, yourname@gmail.com. This is where you want to receive messages.
- From Name: This should be set to
{{name}}. This placeholder pulls the sender’s name from your form. - Reply To: This should be
{{email}}. This allows you to reply directly to the customer’s email address. - Add Title Field: The standard template might not include the “Title” field from our form. To add it, click Edit Content and then choose the Design Editor. You can insert
{{title}}wherever you want the title to appear in the email.
- Apply and Save Changes: After making your edits, click Apply Changes and then Save. Your email template is now ready to use.
Connecting Your HTML Form to EmailJS
Now that your EmailJS service and template are ready, you need to connect them to your actual HTML contact form. This involves making sure your form fields match the template and then adding some JavaScript to send the email.
Understanding Your HTML Form Structure
Your HTML form will look something like this:html
<form id="contact-form">
    <label for="name">Name:</label>
    <input type="text" id="name" name="name" required>

    <label for="email">Email:</label>
    <input type="email" id="email" name="email">

    <label for="title">Title:</label>
    <input type="text" id="title" name="title" required>

    <label for="message">Message:</label>
    <textarea id="message" name="message" required></textarea>

    <button type="submit">Submit</button>
</form>
Key Points for Form Fields:
- Each input field needs a
nameattribute. Thesenamevalues must match the placeholders in your EmailJS template (e.g.,name="name",name="email",name="title",name="message"). - The
idattributes are used to link labels to inputs, but thenameattributes are what EmailJS uses to grab the data.
JavaScript for Sending Emails
You will use a bit of JavaScript code to send the form data. This code will use the EmailJS SDK.
The core part of the JavaScript code will look like this:javascript
emailjs.send("YOUR_SERVICE_ID", "YOUR_TEMPLATE_ID", {
    name: "VALUE_FROM_NAME_FIELD",
    email: "VALUE_FROM_EMAIL_FIELD",
    title: "VALUE_FROM_TITLE_FIELD",
    message: "VALUE_FROM_MESSAGE_FIELD"
})
.then(function(response) {
   console.log('SUCCESS!', response.status, response.text);
   alert('Email sent successfully!');
}, function(error) {
   console.log('FAILED...', error);
   alert('Email failed to send.');
});
Important: The field names in the JavaScript object (name, email, title, message) must match the name attributes in your HTML form.
Getting Your EmailJS Keys
To make the JavaScript work, you need three specific details from your EmailJS account:
- Service ID: This identifies the email service you created earlier.
- Go to Services in your EmailJS dashboard.
- Click on your service name.
- Copy the Service ID.
- Template ID: This identifies the email template you created.
- Go to Email Templates in your EmailJS dashboard.
- Click on your template name.
- Copy the Template ID.
- Public Key: This is unique to your EmailJS account.
- Go to Account settings in your EmailJS dashboard.
- You will find your Public Key there. Copy it.
You will paste these IDs and keys into your JavaScript code where it initializes EmailJS or when you call the emailjs.send() function. The public key is often used to initialize EmailJS at the start of your script.

Testing Your Contact Form
After setting up everything, it’s time to test if your form sends emails correctly.
- Reload Your Form: Make sure your HTML page is reloaded in your browser to include all the latest changes.
- Fill Out the Form: Act as a customer. Enter a name, an email address, a subject or title, and a message. For example:
- Name: Sam Smith
- Email: samsmith@email.com
- Title: Need to Buy Something
- Message: What is the cost of working the golf course for 2 hours?
- Submit the Form: Click the Submit button.
- Check for Success Message: If everything is set up correctly, you should see a message like “Email sent successfully!”
- Verify Your Inbox: Log in to the administrative email account you set up with EmailJS. You should receive a new email with the subject “Contact Us: Need to Buy Something” (or whatever title you entered). The email body will show Sam Smith’s name, email, the title, and the message, formatted according to your template.
This process confirms that your HTML contact form is now fully functional and sends messages directly to your email.
Conclusion
Creating a working contact form for your website does not have to be difficult. By using EmailJS, you can quickly connect your HTML forms to an email service. This lets you receive messages from your website visitors without needing a complex backend server setup. This guide showed you how to set up EmailJS, create email templates, and link your HTML form using simple JavaScript. Now your website can effectively capture messages and help you connect with your audience. If you have any questions, let us know in the comments.
Hey there, I was wondering if you took guest posts on thecodecity.com? If so, how would I go about getting one on your site? If there is a fee, let me know.
Also, if you have any other sites you can get me a post on please list them.
Thanks
Justin
Hi Justin, please email the topic that you’d like to write about to hello@thecodecity.com. Do send samples of any previous pieces too. We’ll email you the details.