

In this post, we’ll learn how we can connect Django to MySQL database in Windows. We have install XAMPP and our MySQL database will be turned on through XAMPP. It is possible to install standalone MySQL and run in without XAMPP, and we can connect to it using Django. But in this tutorial we will be using XAMPP to start our MySQL server and see how we can connect to it using Django. This tutorial assumes that you already have Django and XAMPP installed with Python venv. If you want an in-depth tutorial video, please check out YouTube tutorial below. So Lets get started.

- Installing MySQLClient
- Installing MySQLClient using Python Binaries
- Django MySQL Connection in Settings.py
- Migrating Django Models
Installing mysqlclient

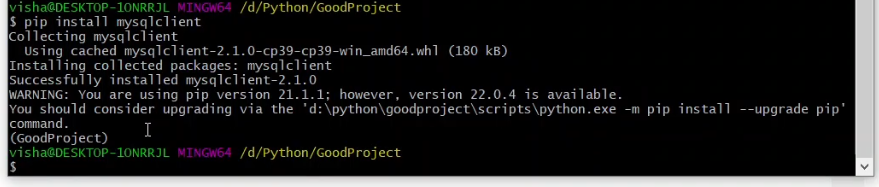
Mysqlclient is a python library that helps us to connect to MySQL using python. This can be installed using python pip. The command to install mysqlclient is below.
Note: We have enabled python environment in our tutorial video and installing this in the virtual environment, if you don’t have it enabled, this will be installed as global package.
pip install mysqlclientInstalling mysqlclient using Python Binaries


There are chances that your mysqlclient installation failed. In case that, please follow this link: mysqlclient and scroll down to mysqlclient section and download the proper version according to your python and os version. After downloading, just use the regular PIP command and installed the downloaded binary, remember to run this command from the directory which contains the downloaded binary. For example:
pip install mysqlclient‑1.4.6‑cp39‑cp39‑win32.whlDjango Settings MySQL Connection
Finally we are at the last part of our tutorial, now we will finally be changing Django setting and using MySQL Engine instead of the default SQLite engine to connect to our MySQL database. Open you settings.py and delete the whole database section and use the following instead. Replace the Name, User, Password, Host and Port as required according to your project and database details.
DATABASES = {
'default': {
'ENGINE': 'django.db.backends.mysql',
'NAME': 'thecodecity',
'USER': 'root',
'PASSWORD': '',
'HOST': 'localhost',
'PORT': '3306',
}
}
Migrating to MySQL Database
Now all of the required packages are installed and we are ready to migrate to MySQL database. As usual, we use the following commands to migrate our models to database.
# Making Required Migrations
python manage.py makemigrations

# Migrating Models
python manage.py migrate
Finally our tasks are done! Now you can just run the Django server using the default ‘python manage.py runserver’ command and you should be successfully able to connect to the MySQL database. In case you run into any issues, feel free to let me know in the comment section below.
More Django Tutorials:
How to Deploy Django in Apache Server
Django Image and CSS Not Loading Issue Solution
how i display the database table in xampp into django webpage. pls help me