
Do you need to send emails automatically from your Python programs? Whether you are building an automated report, a contact form, or a notification system, connecting Python to Gmail’s SMTP server is a powerful skill. This guide shows you how to set up your Gmail account, create a special “App Password,” and write a simple Python script to send emails. This process is straightforward and works for any Python project needing email features.
Why Use an App Password for Gmail?
When you send emails from a Python script through Gmail, you cannot use your regular Gmail password. Gmail has strong security measures in place. It does not allow third-party applications, like your Python script, to log in with your primary password.
This is where an App Password comes in. An App Password is a unique, one-time password that gives a specific application permission to access your Gmail account. It works like a special key just for your script, keeping your main password safe. Using an App Password is a key step to safely sending emails with Python and Gmail.
Generating Your Gmail App Password
Before writing any code, you must create an App Password. Follow these steps carefully:
- Go to Gmail: Open your web browser and navigate to Gmail.
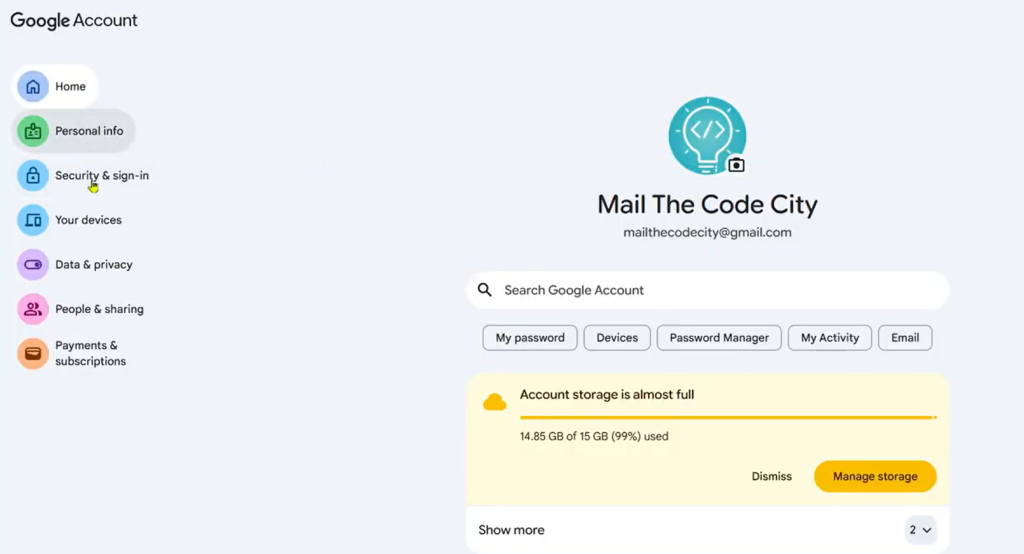
- Access Account Management: Click on your profile icon in the top-right corner of the page. From the menu that appears, select “Manage your Google Account.”
- Find App Passwords: In the Google Account settings, it is easiest to use the search bar. Type “App passwords” and click on the result.
- Re-enter Your Password: For security, you might need to enter your regular Gmail password or passkey again. This confirms it is you.
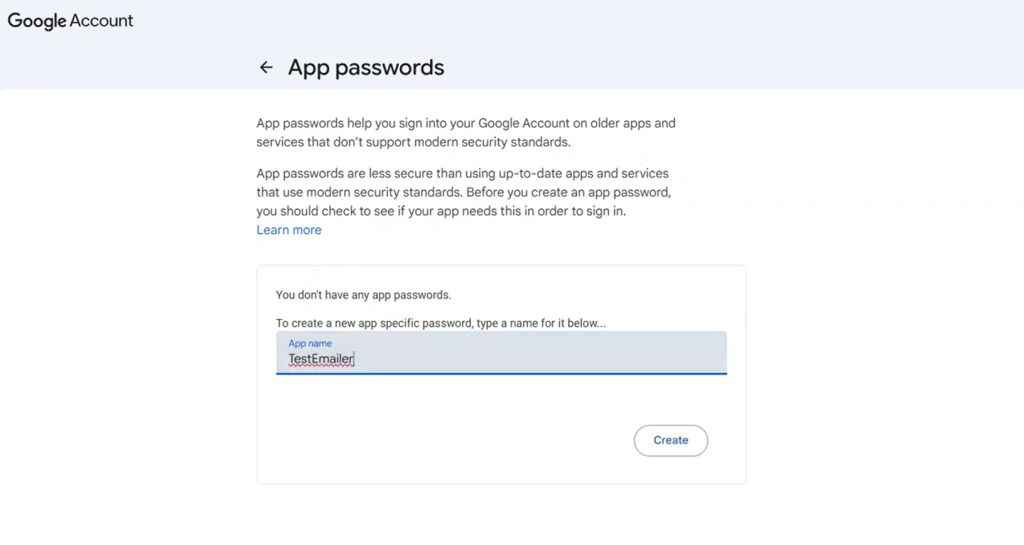
- Create a New App Password:
- You will see a dropdown menu. Select “Mail” for the app type.
- For the device, you can choose “Other (Custom name)”.
- Give your app a name. Something like “Python Emailer” or “Test Emailer” works well.
- Click the “Create” button.
- Copy the App Password: Gmail will then display a 16-character App Password. Copy this password immediately. This is the only time you will see it. If you lose it, you will need to generate a new one.
- Click “Done”: Once copied, click “Done.” Your App Password is now ready to use.
Keep this App Password safe. You will use it in your Python script to log into Gmail’s SMTP server.
Setting Up Your Python Environment
Before you write the Python code, make sure your environment is ready. You need Python installed on your system. You will also use a virtual environment, which helps manage project-specific Python packages.
Github Repo: thevysh/python-emailer
Creating a Virtual Environment
A virtual environment keeps your project’s dependencies separate from other Python projects. This prevents conflicts and makes managing your project easier.
- Open Your Terminal or Command Prompt: Navigate to your project folder.
- Create the Virtual Environment: Type the following command:
python -m venv venvIfpythondoes not work, trypython3instead. This command creates a new folder namedvenvinside your project directory. This folder holds your isolated Python environment. - Activate the Virtual Environment:
- On Windows:
.\venv\Scripts\activate - On Linux/macOS:bash
source venv/bin/activate
- On Windows:
- After activation, you will see
(venv)at the start of your command prompt. This indicates you are working within the virtual environment.
Installing Dependencies
You need a specific Python library to handle environment variables. This library is called python-dotenv.
- Install
python-dotenv: With your virtual environment activated, run:bashpip install python-dotenvAlternatively, if you have arequirements.txtfile (which is good practice for projects), you can install all dependencies at once:bashpip install -r requirements.txtTherequirements.txtfile should listpython-dotenv. - Standard Libraries: Python comes with
smtplibandemail.messagebuilt-in. You do not need to install these separately.
Storing Sensitive Information
It is bad practice to hardcode your email address and App Password directly into your script. Instead, use environment variables. This keeps your sensitive data out of your code, especially if you share your code on platforms like GitHub.
Create a file named .env in the root of your project directory. This file will store your email credentials.
- Create
.envFile: In your project folder, create a new file and name it.env. - Add Your Credentials: Inside the
.envfile, add these two lines, replacing the placeholder values with your actual Gmail address and the App Password you generated:EMAIL_ADDRESS=your_email@gmail.com EMAIL_PASSWORD=your_app_passwordImportant: Do not include spaces around the equals sign. Also, make sure to use the 16-character App Password, not your regular Gmail password.
Writing the Python Email Script
Now, let’s write the Python code to send emails. You will create a file, for example, send_email_cli.py, which will contain the logic.python
import os
import smtplib
from email.message import EmailMessage
from dotenv import load_dotenv

# Load environment variables from .env file
load_dotenv()

def send_plain_email(to_address, subject, body):
    """
    Sends a plain text email using Gmail's SMTP server.
    """
    from_address = os.getenv("EMAIL_ADDRESS")
    app_password = os.getenv("EMAIL_PASSWORD")

    if not from_address or not app_password:
        print("Error: EMAIL_ADDRESS or EMAIL_PASSWORD not found in environment variables.")
        return

    # Create the email message
    msg = EmailMessage()
    msg['Subject'] = subject
    msg['From'] = from_address
    msg['To'] = to_address
    msg.set_content(body)

    try:
        # Connect to Gmail's SMTP server
        # smtp.gmail.com is the server, 587 is the standard port for TLS
        with smtplib.SMTP_SSL('smtp.gmail.com', 465) as smtp: # Using SMTPS for port 465
            # Login to the SMTP server
            smtp.login(from_address, app_password)
            # Send the email
            smtp.send_message(msg)
        print(f"Email sent successfully to {to_address}!")
    except Exception as e:
        print(f"Failed to send email: {e}")

if __name__ == "__main__":
    print("--- Python Email Sender ---")
    receiver_email_input = input("Enter receiver email address: ")
    subject_input = input("Enter email subject: ")
    print("Enter email body (type a semicolon ';' on a new line to finish):")

    body_lines = []
    while True:
        line = input()
        if line == ';':
            break
        body_lines.append(line)
    body_input = "\n".join(body_lines)

    send_plain_email(receiver_email_input, subject_input, body_input)
Understanding the Code
Let’s break down the key parts of the send_plain_email function and the main script.
Importing Necessary Modules
os: Used to interact with the operating system, specifically to get environment variables.smtplib: This module handles the actual sending of emails using the SMTP protocol.email.message.EmailMessage: This class helps create well-formatted email messages.dotenv.load_dotenv: Frompython-dotenv, this function loads variables from your.envfile into your script’s environment._
Loading Credentials
python
load_dotenv()
from_address = os.getenv("EMAIL_ADDRESS")
app_password = os.getenv("EMAIL_PASSWORD")
The load_dotenv() function reads your .env file. Then, os.getenv() retrieves the EMAIL_ADDRESS and EMAIL_PASSWORD values. This keeps your sensitive data secure and separate from your main code._
Creating the Email Message
python
msg = EmailMessage()
msg['Subject'] = subject
msg['From'] = from_address
msg['To'] = to_address
msg.set_content(body)
Here, an EmailMessage object is created. You set the subject, the sender’s address (From), the recipient’s address (To), and the email’s plain text content (set_content)._
Connecting to Gmail’s SMTP Server
python
with smtplib.SMTP_SSL('smtp.gmail.com', 465) as smtp:
    smtp.login(from_address, app_password)
    smtp.send_message(msg)
smtplib.SMTP_SSL('smtp.gmail.com', 465): This line establishes a secure connection to Gmail’s SMTP server.smtp.gmail.comis Gmail’s server address, and465is the standard port for secure SMTP over SSL (SMTPS). UsingSMTP_SSLdirectly provides an encrypted connection from the start.smtp.login(from_address, app_password): After connecting, your script logs in using your Gmail address and the App Password.smtp.send_message(msg): This command sends the email message you created._
Handling HTML Emails
The current script sends plain text emails. If you want to send emails with HTML content, you would modify the set_content part. Instead of msg.set_content(body), you would use:python
msg.add_alternative(html_content, subtype='html')Here, html_content would be a string containing your HTML code. This allows for rich formatting, images, and links in your emails._
Running the Script from the Command Line
The if __name__ == "__main__": block allows you to run this script directly. It prompts you for the receiver’s email, subject, and body of the email. You type your message and then type a semicolon (;) on a new line to tell the script you are finished with the body.
Running Your Email Sender
With your .env file set up and the Python script ready, you can now send your first email.
- Activate Your Virtual Environment: Make sure your virtual environment is activated in your terminal.
- Run the Script: Execute the Python script using:bash
python send_email_cli.py - Enter Details: The script will ask you for:
- Receiver email address: Type the email address where you want to send the test email.
- Email subject: Type a subject line for your email.
- Email body: Type your message. When you are done, press Enter, type a semicolon (
;), and press Enter again.
- Check Your Inbox: If everything is set up correctly, you will see a “Email sent successfully!” message. Go to the recipient’s inbox to confirm the email arrived.
Next Steps
This guide showed you how to send simple plain text emails. Building on this, you can explore more advanced features for your Python email projects:
- Sending HTML Templates: Create beautiful, branded emails using full HTML templates.
- Adding Attachments: Send files like PDFs, images, or documents along with your email.
- Sending Bulk Emails: Learn how to send emails to multiple recipients efficiently.
- Scheduling Emails: Automate the sending of emails at specific times or intervals.
For more tutorials and information on Python and coding, connect with the community on Twitter, Facebook, and Instagram.
Happy coding!